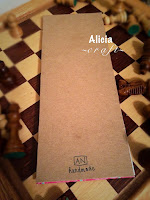
So here's the first thing I made:
It's a notepad. The pages are lined and I printed them from Microsoft Publisher. Every third page has the flower design on the bottom. I used cardboard for the front and back, and covered the front in scrapbook paper with some decorations. I glued it all together so that the pages can be torn out as you use them.
Now for the big project. I'm into bookbinding now, so I started with a nice hardcover journal/notebook. The pages aren't lined.
Now here are some parts of the process. I didn't include everything, but enough to give you a general idea.
(1) I folded printer paper in half—10 signatures of 4 sheets each. 40 pages total.
(2) I sewed the signatures together.
(3) I glued the spine with PVA glue.
(4) I made decorative headbands and glued them to the spine.
(5) I glued the decorative endpapers on—they are made of light blue cardstock. Each piece is 8.5"x11" folded in half.
(6) I glued a piece of cardstock down to reinforce the spine.
(7) I cut medium weight chipboard (instead of bookboard—works just as well) for both covers and the spine.
(8) I used clear packing tape to tape two pieces of scrapbook paper together because one wasn't big enough.
(9) I glued the chipboard down on the paper and folded the sides back before gluing them down. After this (not pictured) I centered the text block in the middle and glued one of the endpapers on each side to the inside cover.
(10) I used cardstock to make the name plate. And voila! It was done.
This is up in my shop, so if you want to make this yours, you can for only $22. There will be more coming soon!
(note: If the cover looks a bit scuffed in places, it's because it's supposed to—it's part of the pattern. Annoying, I know. I just loved the stripes so much.)


No comments :
Post a Comment
Feel free to leave comments or questions.